

Crispy and crunchy, this deliciously spicy chili corn is an incredibly delicious veggie snack or appetizer everybody will enjoy. The fried corn kernels are mixed with a tangy sweet umami sauce to create an enticing and vibrant dish you’ll want to recreate repeatedly! Follow our easy steps using photos and videos to prepare this traditional baby corn recipe for fried chili for dinner tonight.
Fried baby corn chilli can be an accompaniment and is a typical Indo-Chinese fusion snack. It is made up of tender and sweet corn pieces, battered, then fried to perfection. Next, corn is dipped into a sweet and tart sauce to create a deliciously crispy and crunchy vegetarian meal.
The sauce used in this recipe is excellent. You’ll want to try this sweet, bold hot chili with just about any food!
Below, you’ll find step-by-step instructions and photos for making the most delicious baby corn chili at home. I fry the corn here; however, if you’d prefer to deep fry, you can cook the corn pieces that have been battered.
Make a batch for an appetizer, a side dish with veggie-fried noodles, rice, or a tasty snack. You’ll surely love it if you decide to cook and serve this delicious chili corn!
How to make Baby Corn Chilli
Preparation
1. First, wash the baby corn 18-20 (200 grams) (about 1-cup) with water. Then, drain then dry. If they’re large pieces of corn, Cut them in half.
2. I would suggest that you make all the ingredients needed to make the sauce made from fried chili corn:
- Finely chop 5-6 medium-sized cloves of garlic.
- Chop and peel 1.5 inches of ginger
- Slice thinly and seed 1 chili pepper (green pepper)
- Slice or cut up to three green chilies
- Chop 1/2 cup of spring onions
Making the batter
3. In a medium-sized mixing bowl, combine four tablespoons of all-purpose flour, four tablespoons of cornstarch (corn flour), 1 teaspoon of black pepper, 12 to 1/3 teaspoon salt, or mix according to your preference, and the water should be 4 tablespoons.
4. Mix thoroughly to create a thick, smooth batter.
Make sure to coat the batter with batter before cooking the corn.
5. Add six tablespoons of oil to frying in a wok or a large deep skillet at medium-high temperature. You must dip each piece of corn in the batter until it is completely covered.
The batter-coated corn should be slid across along the sides of the bowl to ensure that the batter spills into the bowl.
6. Place the corn pieces coated with batter in hot oil. Be cautious during this step because the oil could splash.
In the video, you can see that I stir-fried corn using less oil. It is possible to fry it in pans either lightly or fry in a deep fryer.
7. Use a skimmer to rotate the pieces gently until they become golden.
8. Continue to turn around and back till the pieces of corn are evenly brown on all sides.
9. Take out with a spoon, allowing any oil to be drained.
10. Place the corn that has been fried on absorbent kitchen paper. Repeat the process of frying with the remaining corn pieces.
Aromatics to fry in the pan
11. You could use the same oil as corn to fry the flavorings. Then, with a spoon, take the excess fat from the skillet and keep just one tablespoon of oil in the pan.
Suppose you want to pour a new tablespoon of olive oil into a new pan. Then, set the oven to medium.
Once the oil is heated, Add the garlic, ginger, green chilies, and white pieces of the sliced spring onion.
12. Increase the heat to medium-high before sautéing for between 1 and 2 minutes.
13. Add the diced and diced red pepper (green pepper). If you don’t want to or aren’t a fan of chili, you’re welcome to leave it out.
14. Stir in and continue stirring for 3 to 4 minutes on medium-high heat until the peppers have been half-cooked but still crisp..
Add sauces and toppings
15. Reduce temperature to moderate, and include 2 tablespoons of soy sauce and 1 tablespoon of sweet sauce made from sweet red or sweet green peppers. It is possible to add additional chili sauce to create an even more spicy version.
16. Mix thoroughly.
17. Check the taste. Add a pint of black pepper and 1 tablespoon of sugar (more or less according to your preference), and add salt as required.
18. Mix it up again.
Making baby corn chilli
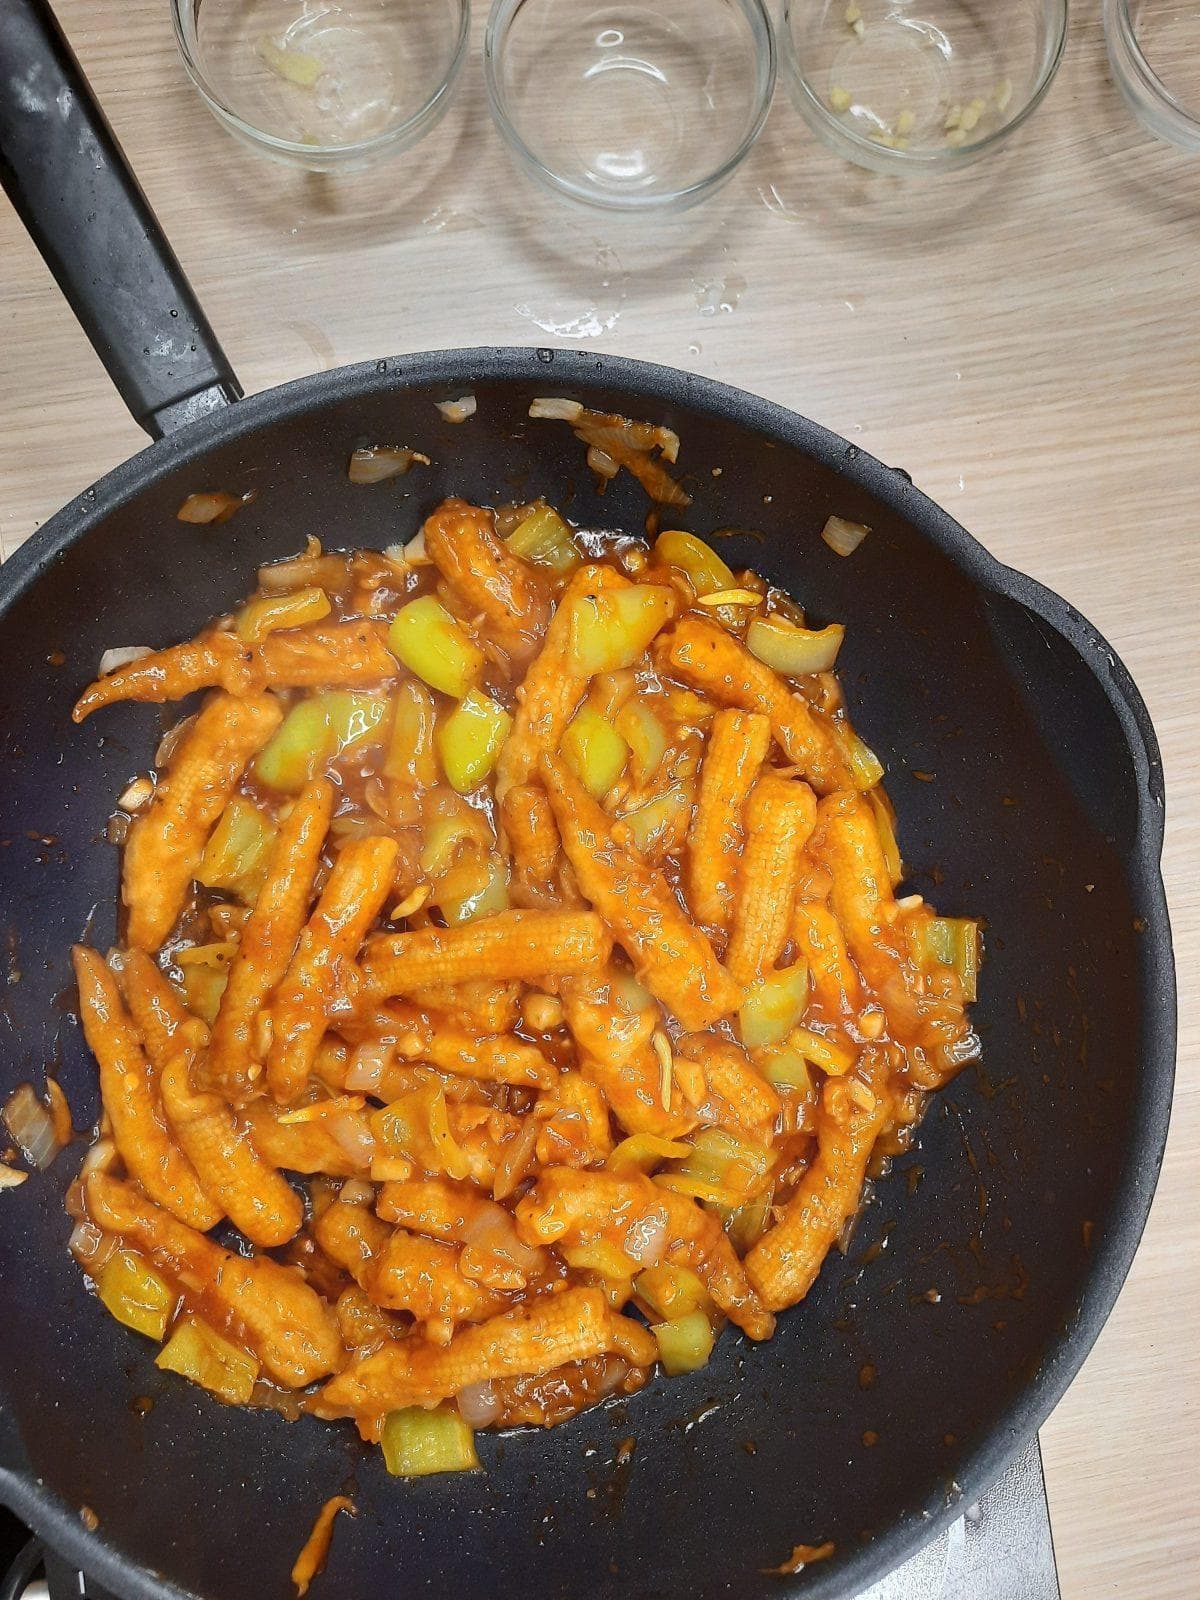
19. Then, add the corn that has been fried to the pan.
20. Be careful not to scratch the batter out of the corn that has been fried.
It is possible to leave this step for a crunchy and crunch baby corn flavor. However, if you’d like a smooth, glazed sauce of corn, continue using the instructions below.
21. Add two to three tablespoons of water to mix once more.
22. Then, sprinkle the dish with 1 tablespoon of cornstarch (corn flour). This provides a unique and smooth glaze for the dish, exactly like the one you get the ones you have at your favorite Indo-Chinese restaurants.
23. Mix well, and cook for between 1 and 2 minutes, or till the cornstarch (cornmeal) is cooked and not visible anymore.
24. Include 1/2 teaspoon rice vinegar to give a spicy taste that blends the entire recipe of corn and chilli. It is also possible to use Apple cider vinegar instead of rice vinegar. However, avoid it if you’re not an avid fan of vinegar’s spicy flavor.
25. Add the green onion tops, cut into slices and mix them again.
26. Serve hot as an appetizer or as a dish that can be served alongside your favorite Chinese main dishes. Chili corn can be eaten by itself or mix it with a hot sauce such as chilli and garlic sauce or schezwan sauce, Sriracha sauce, or a simple condiment like ketchup.
Garnish with a second sprinkle of green onions cut into slices.
Try this Recipe Also: The Best Vegan Chickpea Curry Recipe
Baby Corn Chilli Recipe
This Chilli Corn Recipe is a delicious vegan, vegetarian snack recipe or a great starter recipe that combines crisp fried corn cooked in the sweet, spicy umami sauce. It’s an enticing and vibrant dish that everyone will enjoy.
Preparation time: 30 minutes
Time to cook: 15 minutes
Total time of 45 min
Video Recipe
Ingredients
For Frying
- 4 tablespoons all-purpose flour
- 4 tablespoons of cornstarch (cornflour)
- 1 teaspoon of black pepper
- 12 to 1/3 teaspoon salt, or the amount you prefer.
- 4 tablespoons of water
- Baby corn – 200 grams
- 6 tablespoons of oil – used to fry
For Sauce
- 1 tablespoon oil
- Half cup spring onion whites chopped (scallion whites)
- Two teaspoons of finely chopped garlic 5 to 6 medium-sized garlic
- Two teaspoons of finely chopped ginger, or one to 1.5 inches of ginger
- Two to three green chilies Slice or cut into pieces
- 1/3 cup thinly sliced , or finely chopped capsicum
- 2 teaspoons of soy sauce naturally made and brewed
- 1 teaspoon of sweet and red chili sauce adjust as desired
- 1 teaspoon of black pepper
- 1/2-1 teaspoon of sugar or the amount you require
- salt as is required
- 1 to 3 teaspoons of water Optional
- 1 teaspoon of cornstarch (cornflour) Optional
For Garnish
- 2 chopped fine spring onions (scallion greens)
- 3 green spring onions
Directions
Making the batter
- Dry and rinse the corn using the kitchen towel. Cut the baby corn in half if they’re bigger, or keep them in their entirety if you find them smaller.
- Make spring onions, garlic, green chillies, ginger, and peppers, and place them in a bowl to rest.
- Create a smooth medium-density batter using cornstarch (cornmeal), All-purpose flour, salt, pepper, and water.
- The oil can be heated in a pan or wok.
- Dip each corn piece into the batter, then coat it thoroughly with the batter.
- Carefully place the corn pieces that have been battered into the hot oil.
- When one side is hard and crispy and slightly brown, flip it over and fry the other side.
- Cook your corn till the sides and edges are golden browns. Turn them several times with a spoon.
- Lay the corn in a row on kitchen paper that is absorbent.
Making the sauce
- In a wok, heat around one tablespoon of oil.
- Mix in the chopped spring onions, garlic, ginger, and green chilies.
- Saute on medium-high heat for between 1 and 2 minutes.
- Then add the sliced chili (green pepper). If you don’t have chili, you may skip it.
- Cook over medium-high heat for about 3-4 minutes till the bell peppers have cooked. The peppers should be a bit crunchy.
- Reduce the heat to medium, and include the soy sauce, sweet green sauce, and sweet pepper sauce. Mix thoroughly.
- Then sprinkle the black pepper with salt and sugar. Mix it again.
The Chilli Corn recipe
- Incorporate the corn that has been fried. Mix gently with the remaining ingredients. It can end here if your preference is an extraordinarily crunchy and crunch corn texture. If you prefer a smooth, glazed coating of the corn, continue using the instructions below.
- Mix in 2 to 3 teaspoons of water and mix once more.
- To give the dish appearance and softness, sprinkle 1 tablespoon of cornstarch (cornmeal).
- Mix well, and boil for about 2 to 3 minutes or until the cornstarch has cooked.
- Add the apple cider or rice vinegar to mix and mix again.
- Add all the green herbs chopped into the mix.
- Taste and add salt, pepper, or soy sauce when needed.
- Serve the corn with cut spring onions or chopped celery.
- Chilli corn can be served as an appetizer or alongside bread, or as a dish for a meal with stir-fried noodles or fried rice.
- In the video, I pan-fried the corn using less oil, making the dish more nutritious. But you can decide to pan fry shallow, deep fry, and deep fry.
- It can also be scaled to make a larger batch.
- It is easy to swap rice vinegar with apple cider vinegar or only use vinegar partially if you aren’t a fan.
- Instead of spring onions, you could use regular onions like white onion, red onion, or shallot.
- You can adjust the spice to suit your preferences by adjusting the quantity of ginger, green chilies, garlic, and chili sauce.
- I recommend serving this dish immediately to get the most flavor and taste.
Pin & Share this Recipe
[pinterest-image message=”Baby Corn Chilli Recipe” image=”https://veganiac.com/wp-content/uploads/2022/11/baby-corn-chilli-pin-1.jpg”]


